
Whenever you create a new WordPress blog or website, you have to go through the process of installing all your favorite plugins, again. This might have you wondering if there’s an easier way. In this WordPress tutorial, we will show you how to bulk install all your WordPress plugins from your cPanel and with a plugin.
How to Bulk Install Your Plugins from cPanel
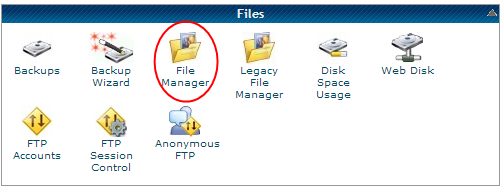
If you use cPanel hosting, you can copy your plugin folders from one WordPress website to another. You will first need to install a new copy of WordPress on your new domain name and the domains will need to be on the same hosting account. Start by logging into your cPanel and go to the “File Manager” section.
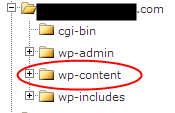
Now, you will need to find the folder called wp-content for the WordPress site that already has your plugins installed on it. Within the folder, you will find a plugins folder, which will have all your plugins listed.
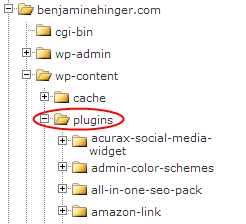
You will need to select all the plugins you want to copy to the new WordPress site. This is done by holding down the “ctrl” key on your keyboard and clicking on each folder for the plugin.

Once you’ve selected all the necessary plugins, use the right mouse button and click on one of the plugins. This will bring up a menu and allow you to click the “copy” option.

Select this option and change the current domain name to the domain of your new WordPress website. The rest of the information should be correct.

Now, just click the “Copy Files” button and you should be all set.
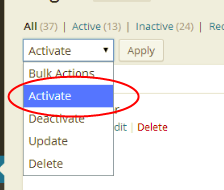
You will need to log into your WordPress dashboard to activate all the plugins. This is done by going to Plugins >> Installed Plugins. Click the box to select all your plugins and use the “Bulk Actions” dropdown to activate them all at once.
This will activate all your favorite plugins and you’ll be ready to start working on developing your new WordPress website.
Using a Plugin to Add All your WordPress Plugins in Bulk
Adding your plugins can also be done with the WP Install Profiles plugin. This plugin allows you to create a custom collection of plugins and automatically install them on a new website. Start by downloading, installing and activating the plugin.
After you’ve activated the plugin, you will need to go to Plugins >> Installed Plugins and find the Installation Profiles plugin.
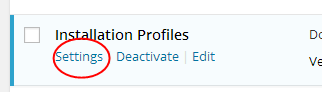
Click the “Settings” link and you will be able to access the plugin menu.
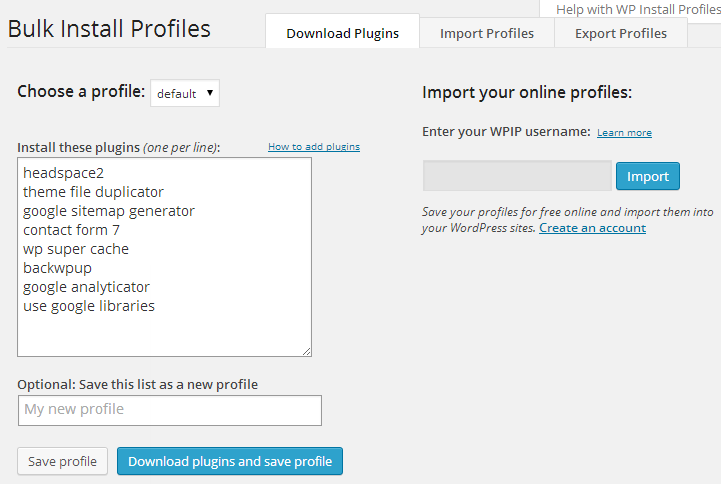
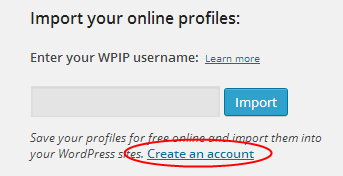
The first list is a default list found with the plugin. However, you can create your own list of plugins by creating an account. Just click the link called, “Create an account” and follow the instructions.
After you’ve created an account, you can create a new profile by naming it, adding a description and adding all the plugins you want to use regularly.
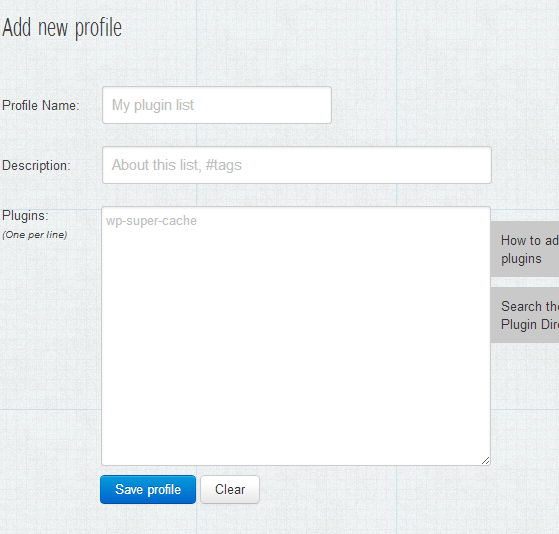
When you click the “How to add Plugins” link on the side of the plugins box, you will get the following:

This will show you exactly how to add your plugins. After you’ve added all your plugins, just click “save profile.”
Now, you will need to go back to your WordPress dashboard and access the plugin settings page, again. Here, you will enter your WPIP username for the profile you just created and click the “Import” button.
This will add all your plugins to your WordPress site and you will just need to activate them. The plugin has many other features, as well, but this is one of the quickest ways to use the same WordPress plugins across multiple websites.
If you plan to build more than one website or blog with WordPress, you may want to create a core set of plugins to use on all of your sites. Once you’ve figured out this list, you can use the Bulk Install Profiles plugin or you can use the cPanel method to copy the plugins from one site to another. This will save you from the hassle of installing each plugin individually.
