

Basic image editing can be done within WordPress. You no longer have to crop, flip and rotate your images before you upload them to your WordPress blog. These features can all be done in WordPress without much issue. Here’s a quick guide to editing images in WordPress.
Editing an Image Within a WordPress Post
When you create a new WordPress Post, you may need to edit an image within the post. This can easily be done from the “Add Media” area used to insert the image. Once you’ve uploaded or selected the right image, you will see the following option:

Just click the “Edit Image” link and you will be able to do all types of things on the next page. You can use the icons across the top to rotate and flip your image.

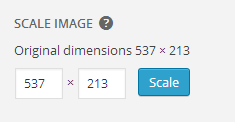
The “Scale Image” section will allow you to change the size of your image however you see fit.
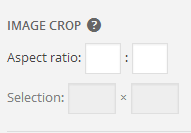
You will also be able to use the “Image Crop” section to crop your image. You can either use the Aspect Ratio too or the Selection tool for cropping.
Once you’ve completed your changes, just click the “Save” button. You will notice any changes you made will apply to the image and you can now insert it within your post.
Editing an Image from the Media Library
Another way to edit your images within WordPress is through the Media Library section. Just go to Media >> Library and find the image you want to edit. Scroll down to the “Edit Image” button and click it.

The next page will give you the same options as above for editing your image. This won’t change the image in any of your posts, however. If you want to change the images within your posts, you will need to find the image in the post and edit it from there.
Now you know that you don’t have to crop, rotate, scale or flip your images when you upload your images to WordPress. You can take care of these edit functions within your WordPress site instead.
