
Adding Bing Maps to your WordPress website makes a lot of sense and you may not know how to go about doing this. If you’ve decided you want to use these maps over the Google Maps, which can also be embedded in WordPress, you need to know how to add them to your blog. Here are the instructions you need for adding Bing Maps to your WordPress website.
How to Add Bing Maps Without a WordPress Plugin
You can easily embed Bing Maps in WordPress without the use of a plugin. Start by visiting the Bing Maps website and searching for the location you want to embed. After you find the right location, you will want to click the “Share” button.
Note: If you’re not logged into a Bing account, the “share” option may not show up.

After clicking the “share” button, you will get a popup screen with multiple share options:

You want to click the “customize and preview” button on this popup, which will take you to a screen that looks like this:

You will be able to change the size of the map, hide links, choose the type of map and completely customize your Bing map from this menu. Once you’re happy with the map you’ve created, click the “Generate Code” button.
You will see an embedded code in a popup widow, which you can copy and paste into WordPress.

You can use this code in a page, post, sidebar widget, header or footer.
How to Add Bing Maps to WordPress with a Plugin
Another way to add Bing Maps to WordPress is through the use of the Leaflet Maps Marker Plugin. This plugin will allow you to add Bing Maps by using the Bing Map API Key. Start by downloading and installing the plugin within your WordPress dashboard.
Once you’ve downloaded the plugin, you will need to create an account in the Bing Maps Account Center.

If you already have an account with Bing, you can connect it to the Maps Account Center by clicking the “Sign In” button, and then the “Continue” button on the next page. You will still need to create an account name to use this feature in Bing, however.
Now, you will need to find and click on the “Create or View Keys” button. It’s located in the left sidebar within your account page.

From this screen you can create a key for the plugin you downloaded and installed in WordPress.

Once you’ve created your Map key, it will display at the bottom of the screen. You will need to copy the entire key and paste it into the plugin.

Go to Maps Marker >> Settings and click on the “Bing Maps” link in the top menu.

Enter your API Map Key from Bing into the box and click the “Save Changes” button.
You will also need to tell the Leaflet Maps plugin to use Bing Maps instead of Google Maps. It will automatically default to Google Maps, if you don’t make the change. To make this change, go to Maps Marker >> Settings and click the "Map Defaults" tab at the top.

You will want to use the “Default basemap for new markers/layouts option,” which should be selected by default. From this screen, select one of the three Bing Map options and click “Save Changes.”

The next step is adding a new Bing Map to your WordPress website. Go to Maps Marker >> Add New Marker and give your new marker a name. Once you've named it, you will want to set the map to a specific location.
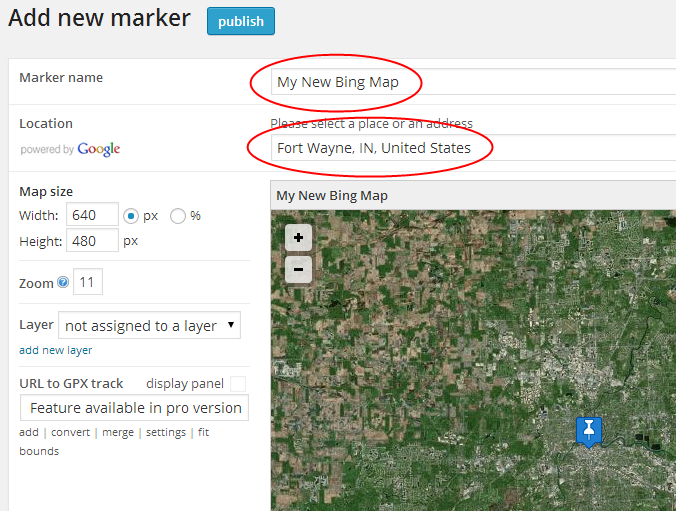
Now you will need to click the “Publish” button. This will give you a short code, which will allow you to insert your new map where you prefer.

You can enter this short code into any part of your WordPress website including posts, pages, sidebar widgets, footers and headers.
Now you know how to add Bing Maps to your WordPress website. You can either use the plugin to add your maps or simply embed Bing Maps within your WordPress blog.
