
As a beginner to WordPress, it’s important to familiarize yourself with each part of your WordPress dashboard. One of the tabs you will probably use quite a bit is called the “Plugins” tab.
WordPress plugins allow users to customize the function, look and feel of their WordPress blog. Some plugins help you with search engine optimization, while others help prevent spam and many other tasks. No matter what you want to do, there’s probably a plugin for it.
In this WordPress tutorial, we are going to cover the three sub-sections found within the Plugins tab. They include:
- Installed Plugins
- Add New
- Editor
Understanding all three of these sub-sections will help you do more with your WordPress website.
The “Installed Plugins” Sub-Section in WordPress
When you go to Plugins >> Installed Plugins, within WordPress, you will find a list of all your currently installed plugins.

These plugins are split into two different categories: Inactive and Recently Active. You can browse the list of installed plugins with the options found at the top of this section.

This sub-section will also allow you to make changes to each of your plugins. You can activate the plugin, deactivate it, delete it or edit the plugin. You can also use the search box to find a specific plugin you’ve installed.

Along with making changes, each plugin will be displayed with a short description in the installed plugins section of WordPress.
The “Add New” Plugins Section in WordPress
The “Add New” sub-section of the Plugins tab is pretty self-explanatory. This is the section you will use to install a new plugin. You can also access it from the “Add New” button at the top of the “Installed Plugins” section.

Within this section, you can search for a plugin to add or upload one you’ve already downloaded. You will need the .zip format to upload a plugin from your computer.
Searching for a new plugin can be one in a few different ways by using the links at the top of the page or the search box.


The search links will allow you to see the featured, popular, newest and favorite plugins. Just click the link you want to view and it will bring up a list of plugins you can browse.

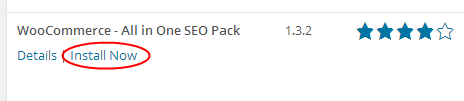
With the search box, you can enter a keyword or the name of the plugin to find the right one to install. Once you’ve found the right plugin, just click the “Install Now” link to install the plugin of your choice.
If you already have the plugin downloaded to your computer, you can add it to your WordPress website with the “Upload” link.

Just click the “Choose File” button to browse and find the .zip file for your plugin. Then, click the “Install Now” button and make sure to activate your plugin once it’s installed.
The “Editor” Section within Plugins in WordPress
Beginners are often confused by the “Editor” section found under the Plugins tab. This section contains the code for all your plugins and the different files associated with the plugins you’ve installed.
Unless you’re working within a plugin you’ve created yourself or you have specific instructions from the plugin support team, you won’t need to use this section at all. If you change the code of one of the files within this section, you could “break” the plugin. Whenever working with code, in this section, make sure to copy and paste the code to a text file on your computer before you start. If you do make a mistake, you can always default back to the original code from the text file.
Most likely, you won’t need to use the “Editor” sub-section of Plugins. It’s rarely used by anybody except plugin developers.
Now, you have a better understanding of how to use the sub-sections of the Plugins tab in WordPress. This tab will allow you to do many fun things with your WordPress website and customize the look, function and feel of your site. Make sure you bookmark this WordPress tutorial for future reference. It may come in handy whenever you’re working within the Plugins tab of your WordPress dashboard.
