
Social media has been growing faster than just about anything else on the internet, which means you need to be able to leverage it for your WordPress blog. The best way to leverage sites, such as Facebook, Twitter, Tumblr and the any others is with your own customized short URL.
Without your own shortened URL, you may end up sharing something automatic whenever you share your blog. However, the right short URL can draw attention, allow for branding and make it easier to share your WordPress blog.
Step #1 – Buy a Short URL
Since many blogs have a longer URL, even if it’s just a company name or your personal name, it’s hard to share it on social sites. However, you can purchase a short URL by using one of the odd extensions as a part of the name. These shorter URLs are quite creative, but you can find them with a tool called Domai.nr.

Just type the world you want to create your short URL with and this tool will try to find the right extension to create your URL. After you’ve done this, you can register your URL with GoDaddy or with a new hosting account from ITX Design.
Step #2 – Bit.ly Tracking
Another way to create your shortened URL is with bit.ly. Not only is this a free tool, but it will also provide tracking for your shortened URL. Start by signing up for a Bit.ly account.
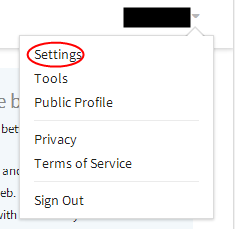
Once you’ve logged in, just click the Settings link found under your username in the right corner.
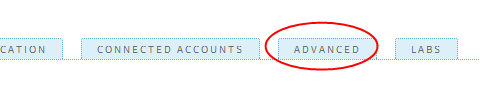
Now, click the advanced tab and use this section to set up tracking for your shortened URL.
Step #3 – Adding Your Site to Bit.ly
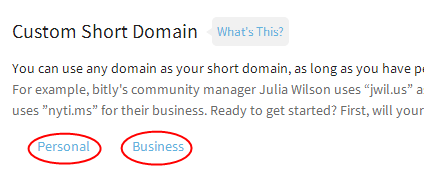
Now, you will need to change the DNS record of your shortened URL. This can be one with the Custom Short Domain option found in bit.ly. Click on either “Personal” or “Business” and add your custom short domain on the next page.
Follow the instructions on this page for setting up your DNS, as well.

Now, you just have to wait for the verification process, which can take up to 48 hours. Once it’s complete, you will be set up with your new customized short URL for social media.
