
Podcasts are very popular and have become a regular thing for bloggers. Starting a podcast may seem difficult and technical, but it doesn’t have to be. When you use WordPress, you can start your podcast much easier. Here’s how you can get started with a podcast on your WordPress website or blog.
How do Podcasts Work?
When you decide to start a podcast, it’s important to know how they work. They are basically an audio series and your users can download the files to listen. They can even subscribe to receive each new episode as soon as you post it.
There are a few tools your users will need to download in order to hear your podcast. Some of the tools, they may already have, such as iTunes. If you submit your podcast to the iTunes podcast directory, it will not only be available to your site visitors, but also millions of other users around the world. Anybody using iTunes will be able to download your podcast to any Apple device.
With an app for Android users, they will also be able to listen to your podcast.
How to Set Up Your Podcast Site
You will need good hosting for your podcast site. Without good hosting, your users may find the download very slow, which may keep them from listening. Make sure you get a good hosting account before you start creating your podcast website.
Most podcasters will actually use a separate hosting account for their podcast files. This is the best way to go and will make your podcasts download faster. One of the best options is to use Blubrry for your podcast files and ITX Design for your website. Blubrry provides many benefits including:
- It’s optimized specifically for podcasting with WordPress
- Comes with the Blubrry PowerPress plugin for WordPress
- Provides a large community of successful podcasters for support
- Provides tools, such as iTunes optimization, ID3 tagging and more
- And More!
What Type of Equipment will you Need?
When you are first starting out, you may be on a limited budget. This may force you to start your podcast with fewer tools than you really want. However, you do want to get a good microphone because the one built into your computer won’t provide good enough quality. Two good choices include:
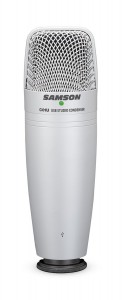
For around $60, you can get this microphone on Amazon.com. It works with a USB port and will provide a much better option than the built-in microphone.
Rode Podcaster USB Dynamic Microphone – $229
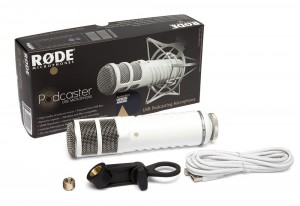
If you can spend a few hundred dollars, this is the absolute best microphone for podcasters that uses the USB port. It will provide great sound quality and works with both Windows and MAC. You can find this one on Amazon.com, as well.
Along with a microphone, you may want to get a mic arm, pop filter and shock mount. The Rode Podcaster Kit on Amazon.com comes with a mic arm and a chock mount, which makes it a great choice. You should also get a good set of headphones.
How to Record your Podcast
One of the most important parts of your podcast is recording it. If the recording isn’t clear, it won’t provide the user with a very good experience. The microphone will help, but you will also need good audio recording software.
The good news is that one of the best types of software for recording podcasts is free. It’s called Audacity and it’s an open source software that works across multiple platforms. It will provide studio-quality recordings, which is perfect for your podcasts.

Once you have installed Audacity, you will want to open it up and create a new project form the file menu. You don’t need to worry about any coughing, breaks, pauses or glitches. You can go back and edit these out after it’s done.
It’s also possible to use the import music files feature in Audacity for background music. You can find this feature under File>>Import.
We are just covering a little bit of the basics with Audacity here. There are plenty of online tutorials to help you with all the details of the program from TeamAudacity.
After recording the podcast, it will need to be exported. It’s best to export in MP3 format because of the good quality and the smaller file size. You should be smart about naming your podcast. Most suggest using a name, such as WPB001.mp3.
How to Publish Your Podcast
Before you go any further, you will need to install and activate the Blubrry PowerPress Podcasting WordPress Plugin. This plugin will work with Blubrry and will allow you to easily publish your podcast.
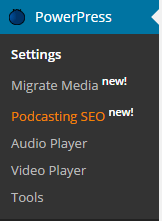
After activating the plugin, you will see a new menu called PowerPress.
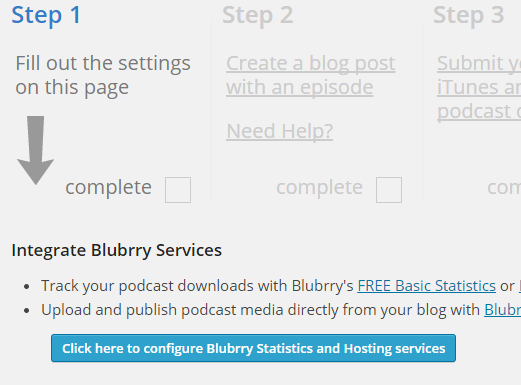
For those using Blubrry to host the files for podcasting, you will need to click the configure button to integrate your services.
This will give you a popup with a username and password.
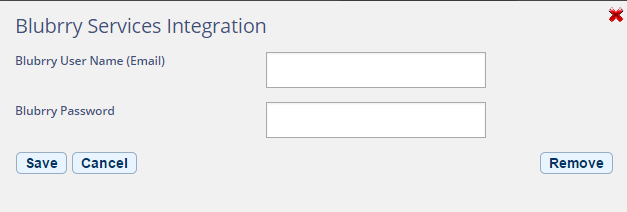
Just enter your information and click the save button.
Now, you will need to fill in all the podcast settings found on the same page.

Make sure to save your settings, once you are finished.
If you have already uploaded your podcast files to Blubrry, it’s time to publish your first podcast. Start by going to Posts>>Add New, just as you would to post new content to your blog. You may want to create a separate category for your podcasts.
Give you podcast a title and add some type of description to the edit area. Then, scroll down to the button of the page and you will have a section called “Podcast Episode.”

If you’re using Blubrry hosting for your podcast files, you can click the folder icon and select your file from there. Those not using Blubrry can enter a medial file URL and click the “verify” button.
Now you can create podcast episodes for your blog. There are many places you can share these with other users and connect with those looking for the type of information you provide.
